What is a Slump Test?
A quick test termed the slump test could be used to determine how easy it is to work with concrete.
slump test
In construction sites, the Slump cone test is a basic and traditional method of evaluating the workability of new concrete.
Definition
The workability, or fluidity, of concrete is measured using the Concrete Slump Test. This is a method of determining the firmness or stiffness of concrete in an indirect way.
Slump test is a technique for determining concrete consistency. The stiffness, or consistency, of the mixture, reveals how much water was utilized. The stiffness of the concrete mix must be adjusted to the completed manufacturer’s performance objectives.
Also Read: Planning and Site Preparation for Concrete
Principle of Slump Test
Slump test is a measure of how much water has been supplied to the surface of the concrete cones, that tells us that much of the concrete mix is workable.
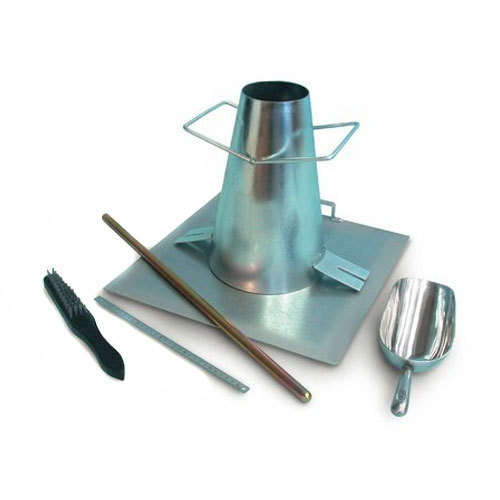
Slump Cone Test Apparatus
For slump cone tests, the following equipment is used:
- The slump cone has an interior diameter of 20cm at the base, 10cm at the top, and a height of 30cm
- The clamps on the base plate can be used to attach the foot parts.
- For convenient transporting, the base plate features a lifting handle.
- Also available is a graded steel rod with a 16mm diameter and a 600mm length, rounded at one end, and graduated in mm.

slump cone test apparatus
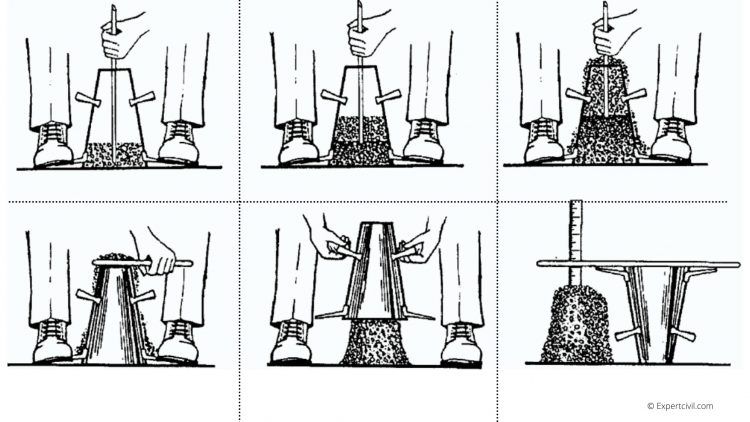
Procedure of Slump Test
- If the test is being conducted on the ground, a sample of the concrete mix must be acquired for the test.
- Wet sieving is required for concrete that contains aggregates with a maximum size of 38mm (millimetres) or larger.
- Before starting the test, the inside surface of the mould must be properly cleaned and clear of excess moisture and set concrete.
- The mould must be put on a flat, horizontal, stiff, and non-absorbent surface, such as a precisely levelled metal plate, and it must be kept firmly in place while it is being filled with the material to be used.
- Every fourth layer should be filled into the mould, and each layer should be about one-fourth as high as the mould.
- There are twenty-five strokes of the tamping rod on each layer.
- As far as the second and subsequent layers are concerned, they must penetrate through all three layers to a uniform extent across their whole cross-section.
- This layer must be tamped all the way down to the bottom.
- Following rodding the top layer, the concrete must be leveled with a trowel or tamping rod so that the mould is completely filled.
- Only after the upper surface has just been rodded, screed as well as roll the tamping rod to remove the concrete surface.
- If there is any mortar that has spilled here between mould as well as the base plate, it must be wiped out.
- In required to remove the mould, gently and cautiously raise it vertically.
- Concrete can then drop and be assessed by measuring the difference between a mold’s height as well as a test specimen’s peak height.
- They must be performed in an area that is free of vibration or stress, and then within 2 minutes of the sample being taken.
The procedure of slump test
Also Read: Different Types of Concrete Mixer or Concrete Mixing Machines
Precaution During Slump Test
- For a field test, it must be conducted in a vibration-free environment within 2 minutes following mixing.
- If the slump test is done 10 minutes following mixing, valid findings can be obtained in the laboratory.
- It is possible to repeat the test if the slump collapses or shears off laterally, so if the findings are the same, the fact must be noted and the slump quantified.
- All values should be converted to weight by multiplying the volume by bulk densities in a laboratory test.
- The strokes must be applied equally across the concrete portion.
- When removing the cone, it should be done carefully, by pulling it up and away from the concrete.
- Mold must be firmly pushed against the base while filling.
- Increased subsidence may also be caused by vibrations from nearby machines; thus, tests should be conducted outside of the ground vibration range.
Shapes of Concrete Slump
There are 4 types of a concrete slump:
- Zero slump
- True slump
- Shear slump
- Collapse slump
Zero slump
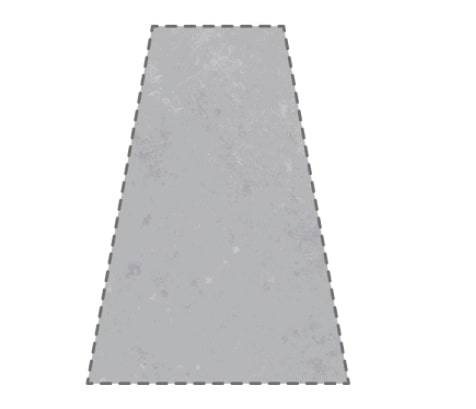
It’s called zero slump if the concrete keeps the exact shape of the mould, which means that it’s rigid, consistent, and nearly impossible to work.
Zero slump
True slump
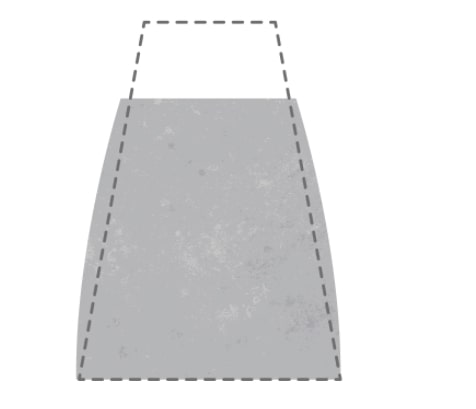
For a true slump, the concrete settles quickly and mostly maintains the molded shape. Preferably, you need to be in a slump like this.
True slump
Shear slump
In a shear slump, one-half part of a cone slides down an inclined plane. The shear slump concrete is an indication that the concrete mix lacks cohesiveness. Throughout the case of a harsh mix, shear slump might develop.
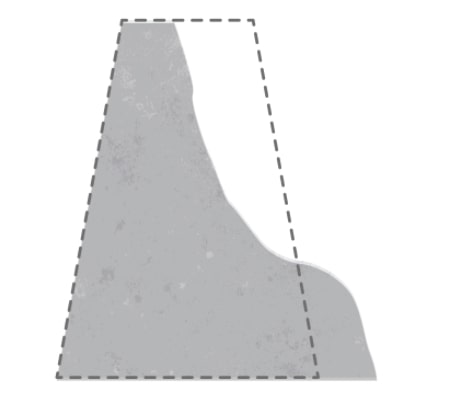
Shear slump
Collapse slump
This is a full collapse of fresh concrete.
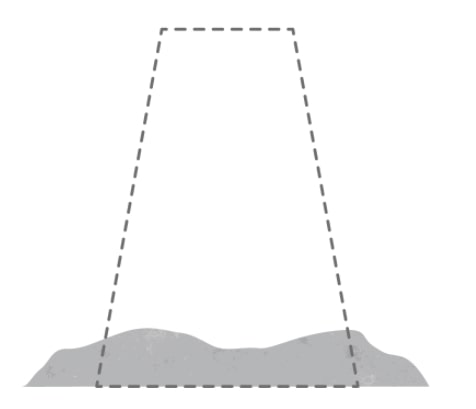
Collapse slump
Factors Influencing Slump Cone
- Chemical composition, fineness, particle size distribution, moisture content, and temperature of cementitious materials
- The aggregates’ size, texture, combined grading, cleanliness, and moisture level.
- Chemical admixtures quantity, kind, combination, interaction, order of addition, and its effectiveness.
- Composition of concrete in terms of its air content.
- batching, mixing, and transporting concrete
- The concrete’s surface temperature.
- Concrete sampling, slump-testing technique, and test equipment conditions
- Measuring the amount of free water in concrete, as well as how long it has been since concrete was mixed.
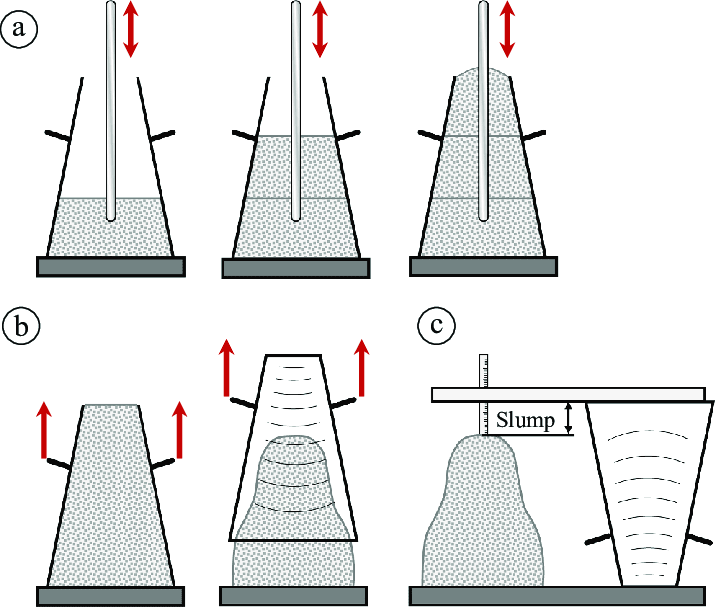
slump test of concrete
Also Read: Factors Affecting Selection Of Construction Material
Different Standards For Slump Test
| US Standard | ASTM C143, ASTM C143M |
| American Association of State Highway and Transportation Officials | AASTO T119, AASHTO BS 1881–102 |
| British and European Standard | BS EN 12350-2 |
| Indian Standard | IS 1199-1959 |
| Indian Standard | IS 7320-1974 |
Slump Cone Test Video
Frequently Asked Questions Related to Slump Test
What is the importance of slump cone test?
Under gravity, a compacted concrete cone behaves in a certain way. As a practical method of determining the workability of a material, the slump test should be used. During a project, changes in slump may reflect changes in materials, water content, or mix proportions. Because of this, it is useful in controlling concrete production quality.
Why slump cone test is done?
It is used to test the workability of freshly created concrete, and hence the ease with which concrete flows. An incorrectly mixed batch can also be detected by using this method.
How much Slump do you need for a slab?
The allowable range of slump for slab is 50mm to 100mm.
What is the ideal value of slump?
As an instance, the slump of a dry sample is between 25 and 50 millimetres (mm) and for a wet concrete slump, on the other hand, might range from 150 to 175 mm.
How is Slump value calculated?
The difference in height between the mould height and the average value of the subsidence is called the slump value.
What is a good concrete slump?
A 4-inch slump is a good concrete slump.
What are the limitations of slump test?
1. Between the workability and slump value, there is no clear correlation.
2. It is not suited for concrete with aggregates larger than 40 mm in size.
3. As a result, it’s tough to determine which value is the proper one, because there’s a wide range of possibilities.
4. Plastic mixes are the only ones that cause a slump. It doesn’t happen with dry mixes, however.
Slump cone test for M20?
In order to obtain workability for M20 grade concrete, the water-cement ratio of 0.5, as well as superplasticizer of 2 %, were used. M20 concrete has a slump range of 100 mm to 160 mm.


Leave a comment